Tutorial #1: Admin
Create a first basic website : admin application
New: better tutorial available!
The "Diem Ipsum" tutorial is now available! It replaces this one and is now recommended to begin with Diem: A week of Diem Ipsum Tutorial
This tutorial is heavily inspired by the symfony one.
We will create a blog in very few time. Like symfony, Diem is not designed to build simple blogs, but complex websites. But a blog could be a good starting point.
Create a project
We will assume you already downloaded Diem, checked your server requirements and created an empty project.
You have now an empty project, and you are able to log into the admin application.
Initialize the data model
So, the blog will handle posts, and you will enable comments on them.
Edit the config/doctrine/schema.yml and paste the following data model:
Post:
  actAs:              [ Timestampable, Sortable ]
  columns:
    title:            { type: string(255), notnull: true, unique: true }
    excerpt:          { type: string(800) }
    body:             { type: clob, extra: markdown }
    image_id:         { type: integer }
  relations:
    Image:
      class:          DmMedia
      local:          image_id

Comment:
  actAs:              [ Timestampable ]
  columns:
    post_id:          { type: integer, notnull: true }
    author:           { type: string(255), notnull: true }
    body:             { type: clob }
  relations:
    Post:
      foreignAlias:   Comments
      onDelete:       CASCADE
Learn more about the schema.yml file in the configuration documentation
Initialize the modules
Edit the config/dm/modules.yml file and paste the following module description:
Content:

  Global:

    main:               # the main module is required, and must not be removed.
      components:
        header:
        footer:

  Blog:

    post:
      page:             true
      components:
        list:
        show:

    comment:
      parent:           post
      components:
        listByPost:
          filters:      post
        form:
In addition to the main module, we described the post and the comment modules. Note that comment declares its parent : post.
Learn more about the modules.yml file in the module documentation
Apply changes
As we modified the schema.yml, the first thing to do is... migrate the database.
In command line, from your project root dir, run:
php symfony doctrine:generate-migrations-diff

php symfony doctrine:migrate

php symfony dm:setup
Rest a bit and have some fun
We worked hard. Now, we want to see the results.
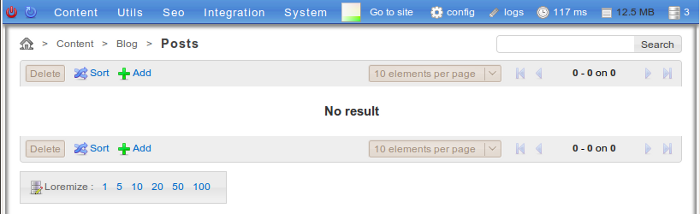
Log into the admin application. In the Content menu ( upper tool bar ) we now can see the "Posts" and "Comments" links.
Click the "Posts" link. You will see an empty list of posts.
Create some dummy posts
We could write fixtures, but we are way too lazy for that, and will let Diem create random posts for us.
On the bottom of the admin posts page, there is a "Loremize" box. Click on 5 to create 5 random posts.
Now we have posts in the blog, with images and text. As the image and excerpt are not required, for some posts they are intentionally left empty.
Do the same operation on the comments admin page. You should create more comments than posts. Comments are randomly linked to posts.
Play with admin
You may want to try the admin features:
- create, update and delete posts and comments
- sort posts
- add images to the posts
- try the posts markdown editor
- use the pagination and the search engine
Learn more about your Diem admin interface.
Well, the admin work is complete. Let's create the front application
Questions and Feedback
If you need support or have a technical question, you can
- Get help with the Google Group
- Get help with the Forum
- Come and chat on the #diem IRC channel on freenode